Some memories demand to be remade.
One of the few culinary memories I have been completely unable to experience outside of a home kitchen is alcapurrias. This classic Puerto Rican fritter features prominently in my childhood as an occasional treat, especially around holidays, and made for exciting lunches because of their rarity. On occasion, the whole family would get together to make an especially large batch, a rustic experience wonderfully out of place in our big-city home. Posted recipes posit that the alcapurria is a variety of croquette and usually recommend the familiar croquette log or cigar shape, but the ones I knew were round, more like hand-pies or empanadas in size and presentation. Once I left Miami, those memories became more and more distant, and more and more treasured. As a matter of my Puerto Rican pride, I needed to take control of those memories and make them more firmly mine, and that meant learning how to make alcapurrias. And today, I succeeded.
Alcapurrias were not a staple food in my childhood in part because they are a decidedly high-effort dish. Unlike the croquettes of which they are sometimes considered a variety, they are not widely available already made, meaning each encounter involved my family’s personal effort. Large quantities of the alcapurria’s component starches must be grated to a fine paste to make its dough, which is hard on the wrists, takes a long time, and comes with a risk of injury. Because of this difficulty, alcapurrias are traditionally made in large batches, reducing the time per alcapurria. This recipe reflects that tradition. I faced an additional challenge in mastering this dish, in that I was doing so from Ottawa, and a critical ingredient in alcapurrias is a tropical root vegetable I grew up calling malanga.
What’s a Malanga?
“Malanga” is the traditional Cuban name of the corm (semi-underground storage stem) of Xanthosoma sagittifolium, a plant in the arum family. This family also contains wildflowers like jack-in-the-pulpit, ornamental plants like pothos vine and calla lilies, and a variety of other edible corms. Native to lowland regions of South America, X. sagittifolium has been an indigenous food plant for thousands of years. Following humans in their migrations, it spread to Central America and to the Caribbean islands much as yuca did, becoming a staple crop throughout the region. After European contact, colonizers and other migrants spread it farther, bringing this crop to the attention of cultures who had never seen it in Africa and Asia. Along the way, to my chagrin, X. sagittifolium acquired a deeply frustrating relationship with names.
My searches for malanga pointed me at several other plants, and even now, searching the name “malanga” can point a person in several directions. Wikipedia flags this name as pertaining to Colocasia antiquorum, an East Asian arum otherwise known as the “eddo.” Google’s default search results can instead connect the name “malanga” to taro (Colocasia esculenta), the staple crop of the South Pacific, as a result of X. sagittifolium getting spread there and being confused for the original taro. Both taro and eddo are relatively close cousins of X. sagittifolium, but their flavors are distinct and cannot replicate the classic alcapurria experience. Searching for the Puerto Rican name for this plant, yautía, offered little help, with sources still attributing this name to any of the three plants in various combinations—usually different from the attributions made for the name malanga. The internet, seemingly, was in denial that X. sagittifolium even existed, and seemed convinced that eddoes and/or taro filled this role in people’s kitchens. But abortive tries with these proposed substitutes proved that neither was the malanga/yautía I sought. Meanwhile, tropical foliage enthusiasts know X. sagittifolium and a few of its cousins as the “elephant ear plant,” grown for its large, attractive leaves without knowing that they, too, are apparently edible. It was not until this article that I could untangle my confusion and aim my searches more productively.
So armed, I persevered. At last, I found Xanthosoma sagittifolium, the plant I had known as “malanga” in my youth, sold under the name “lila malanga” in one specialty grocery store in Ottawa, after so many other vendors had only eddo and/or taro in stock.
“Lila malanga,” as Ottawa’s grocery calls it, is a long, thin, purple-brown root, visually distinct from the much thicker taro and the short, round eddo, but also clearly related to them. Like its Colocasia kin, X. sagittifolium has a hairy, almost elephantine appearance, but the long hairs are often rubbed off much of its length by the time it reaches distant shores. Under its thin skin, X. sagittifolium flesh is exceptionally slippery, making the experience of working with it quite different from more common root vegetables such as potatoes or carrots.

The more I think about it, the more interesting I find it that my family used the Cuban name “malanga” rather than the Puerto Rican name “yautía” when talking about this plant, given that the Puerto Rican side of the family did the cooking.
Back to the Recipe
Making alcapurrias by oneself is an all-day affair. One should anticipate that this process takes about five hours, including a break after the arm workout of grating the dough components. The result is 15-16 fritters in classic hand-pie size, one or two of which provides a filling meal. With a stand mixer with a grater attachment or some other powered aid, or with one or more assistants, the time commitment is correspondingly reduced. I did mine by hand, partly from lack of other options, partly for the communion with my memories of grating malanga by hand.
Equipment
You will need a deep fryer or a pot capable of holding enough oil for frying, a shallower pot, two large bowls, a vegetable peeler, a cheese grater, your favorite measuring tools, a paring knife, a chef’s knife, a blender, a metal spatula, metal tongs (optional), wax or parchment paper, and a surface lined with paper towels. You will also need a stove or other source of bottom-up heat.
Ingredients
Filling
- Green bell pepper, ½
- Cuban oregano, fresh, ¼ cup
- Small Roma tomato, 1
- Dried hot pepper, 1
- Chorizo, 2 ounces
- Ground beef, ½ lb
- Dried oregano, ½ teaspoon
- Salt, ½ teaspoon
- Vegetable oil, 2 teaspoons
- Water, 1 cup
- Pimento-stuffed Manzanilla olives, ¼ cup
- Raisins, 2 teaspoons
- Capers, ½ teaspoon
- Variants: If you are not worried about managing FODMAP risk, add 1 clove of garlic and ½ of a small onion.
Dough
- Green bananas (guineos), 8. These are ordinary bananas that are sold deliberately underripe. Using ripe bananas will result in an unusually sweet batch of alcapurrias. Using plantains will confuse the ratio of guineo to malanga.
- Water, 8 cups
- Salt, various quantities (see below)
- Malanga/yautía (X. sagittofolium), 2 lbs (about three corms)
- Vinegar, 2 teaspoons
- Vegetable oil, 2 tablespoons
- Oil for frying
Common Food Restrictions
- Gluten-Free: This recipe is naturally gluten-free.
- Ketogenic / Low-Carb: This recipe is very high in carbohydrates by its nature.
- Low-FODMAP: This recipe is already designed to reduce its potential FODMAP content. However, sources conflict on whether malanga/yautía is itself a high-FODMAP food and my reaction to eating large amounts of it suggests it should be consumed sparingly if one is avoiding FODMAPs.
- Vegetarian/Vegan: Use your preferred meat substitute and adjust cooking times accordingly.
Preparation
Filling
- Blenderize the green bell pepper, Cuban oregano, dried hot pepper, Roma tomato, and (if present) the garlic and onion. For a more convenient texture later, you can include the olives here as well, but I prefer to leave them whole.
- Cut the chorizo into small pieces.
- Put the ground beef and the ingredients from Step 1 and Step 2 in the pot and set heat to medium-high. Add the dried oregano, salt, vegetable oil, and water. The water serves to help the other ingredients mix.
- As the water reduces, add the olives, capers, and raisins.
- Continue heating until the water is mostly gone. Set aside to cool.
Dough
- Peel the green bananas. Green bananas do not separate from their skins the way ripe bananas do. I recommend cutting a slit along the curve of the banana and using a thumb to separate the peel from the flesh on the inside, going around the banana and along this slit to complete the separation. Remove any remaining flecks of skin from the bananas. Place the peeled green bananas in a bowl with the water and 2 tablespoons of salt.
- Peel and grate the malanga using the fine option on the grater. The goal is a paste, not ribbons.
- Because malanga is so slippery, I recommend peeling about 10 centimeters of the pointed end, grating the peeled portion, and peeling another 10-centimeter segment, repeated until one reaches the scaly (top) end of the malanga. This enables the chef to hold onto the much less slippery skin rather than the flesh underneath.
- Because malanga is relatively floppy, it is important to keep it from flopping too much during grating. If it snaps, grating it becomes more dangerous.
- Once the malanga is grated, drain the bananas. Grate the bananas into the same container as the malanga.
- If you can create alcapurria dough by hand without leaving flecks of blood and skin in it due to contact with the grater, consider that you may be either a food-processing robot from the future or the platonic form of the Boricua abuela waiting for when she is once again needed to bring love into this world.
- Add the vinegar, vegetable oil, and 4 teaspoons of salt to the banana/malanga mixture and mix well. Hands work best.
Assembly and Frying
- Make 15 to 16 palm-sized discs of dough on parchment or wax paper. This should use up a bit more than half the dough.

- Add 1 tablespoon of filling to each disc.
- Use the remaining dough to cover the discs so that none of the filling is visible and there are no holes. You will likely have excess filling.
- Heat your fryer oil to 170 °C (338 °F). Carmen Aboy Valldejuli recommends a somewhat hotter temperature, but I fry with coconut oil and this temperature avoids smoke without negatively impacting the results.
- Introduce an alcapurria to the fryer using a metal spatula. This tool helps remove the sticky fritter from the wax or parchment paper and bring it to the fryer without it disintegrating.
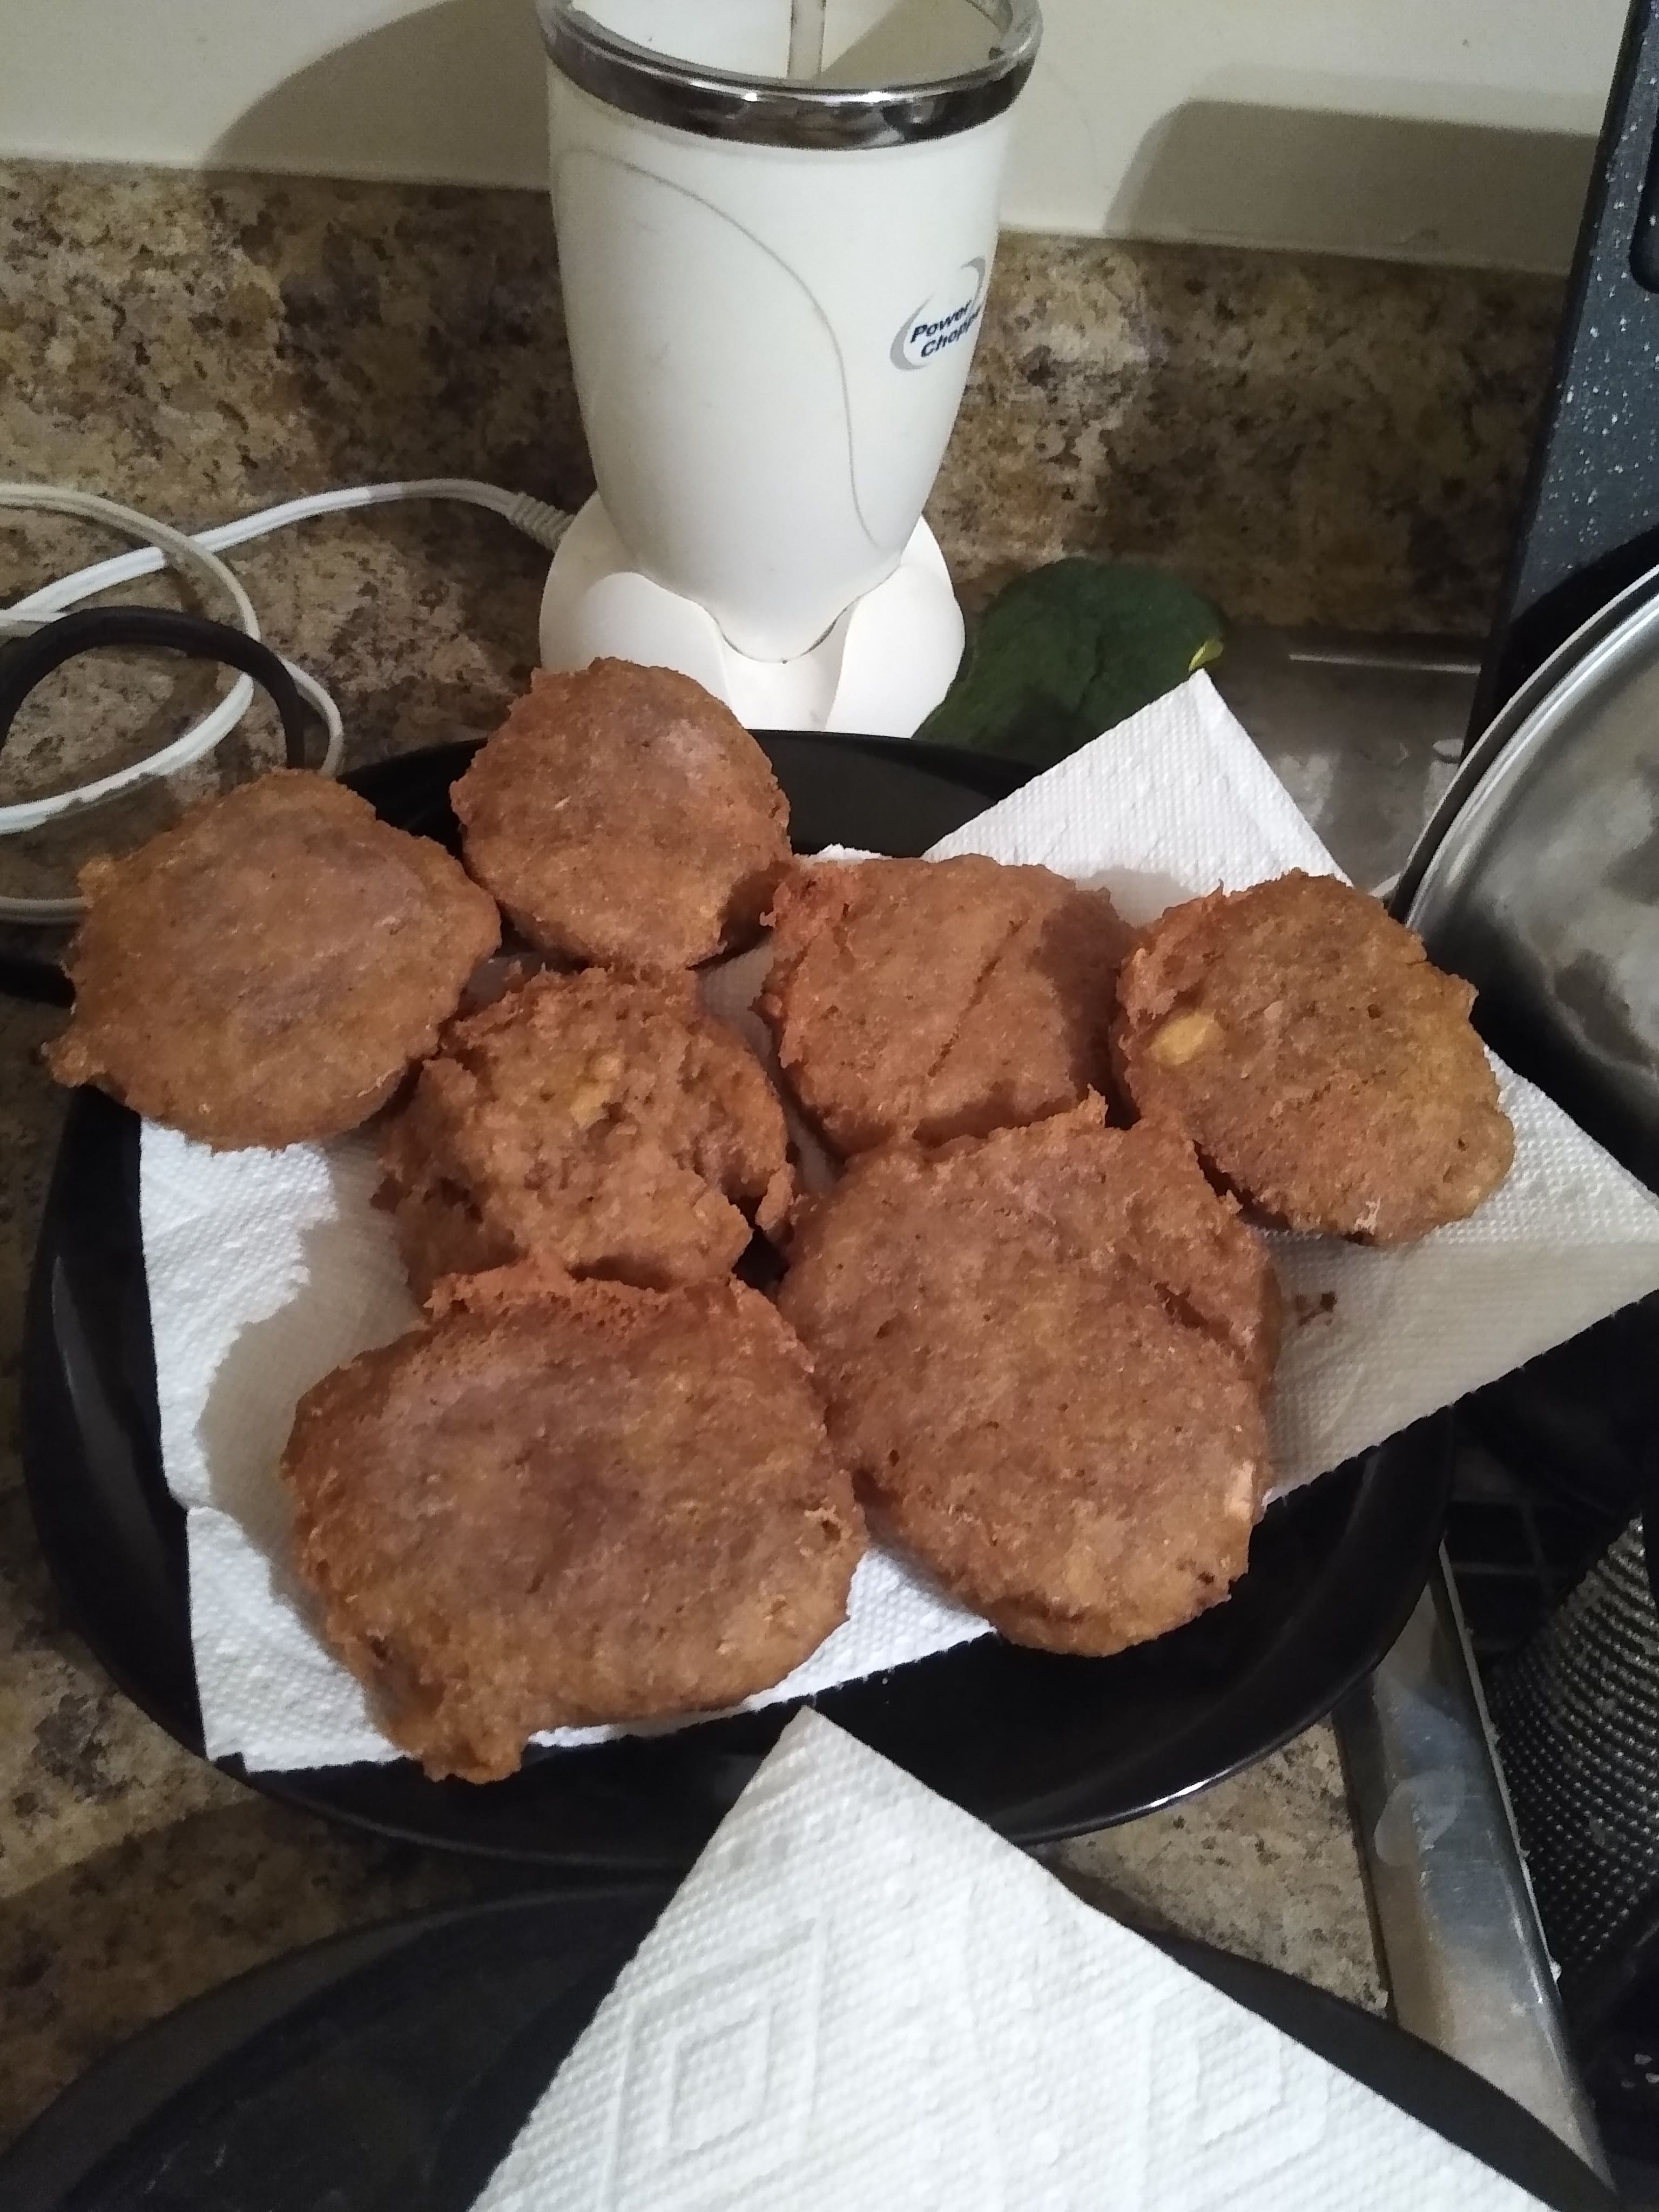
- Unless your fryer is unusually large, fry the alcapurrias individually until they are golden brown and cooked through, 5 to 7 minutes each. Drain on paper towels and serve.

It is a triumphant moment that finds me able to make these traditional Puerto Rican treats myself, and to share them with friends who have no experience with anything like them. It has also earned me a jolt of my grandmother’s delight, as she sees her skills passed on to another generation, and that makes me happy. I hope this recipe enables you to provide a similar joy to the people in your life.