
Contouring is one of those things that seems really intimidating. It doesn’t help that many guides to it don’t start with the basics and launch into placement of colors. I was personally quite freaked out by contouring until very recently. Even now, I’m still exploring different ways of doing it.
Here is what I’ve learned about contouring that I learned from experience more than from what I’ve read online and heard from others, as well as some links that have helped me.
Let’s start with the basics.
What is contouring?
Contouring is a form of make-up application that uses the principles of light to change how a face looks. Light is reflected in the highlighted areas and deflected from the shaded (or “lowlighted”) areas. Through the use of bright and dark pigments, someone’s appearance can be subtly enhanced or dramatically changed.
Why would I want to contour?
Making your face look different can be fun. A lot of contouring guides focus on “fixing problems” in a way that is very beauty-normative, but I prefer to think of it as a way to enhance my features and/or broadcast a particular vibe. I can make my face look more or less angular with contouring which changes my overall look. Of course, there’s nothing wrong with wanting to downplay a certain feature. I have days where I am not 100% fierce and simply want my nose to look smaller.
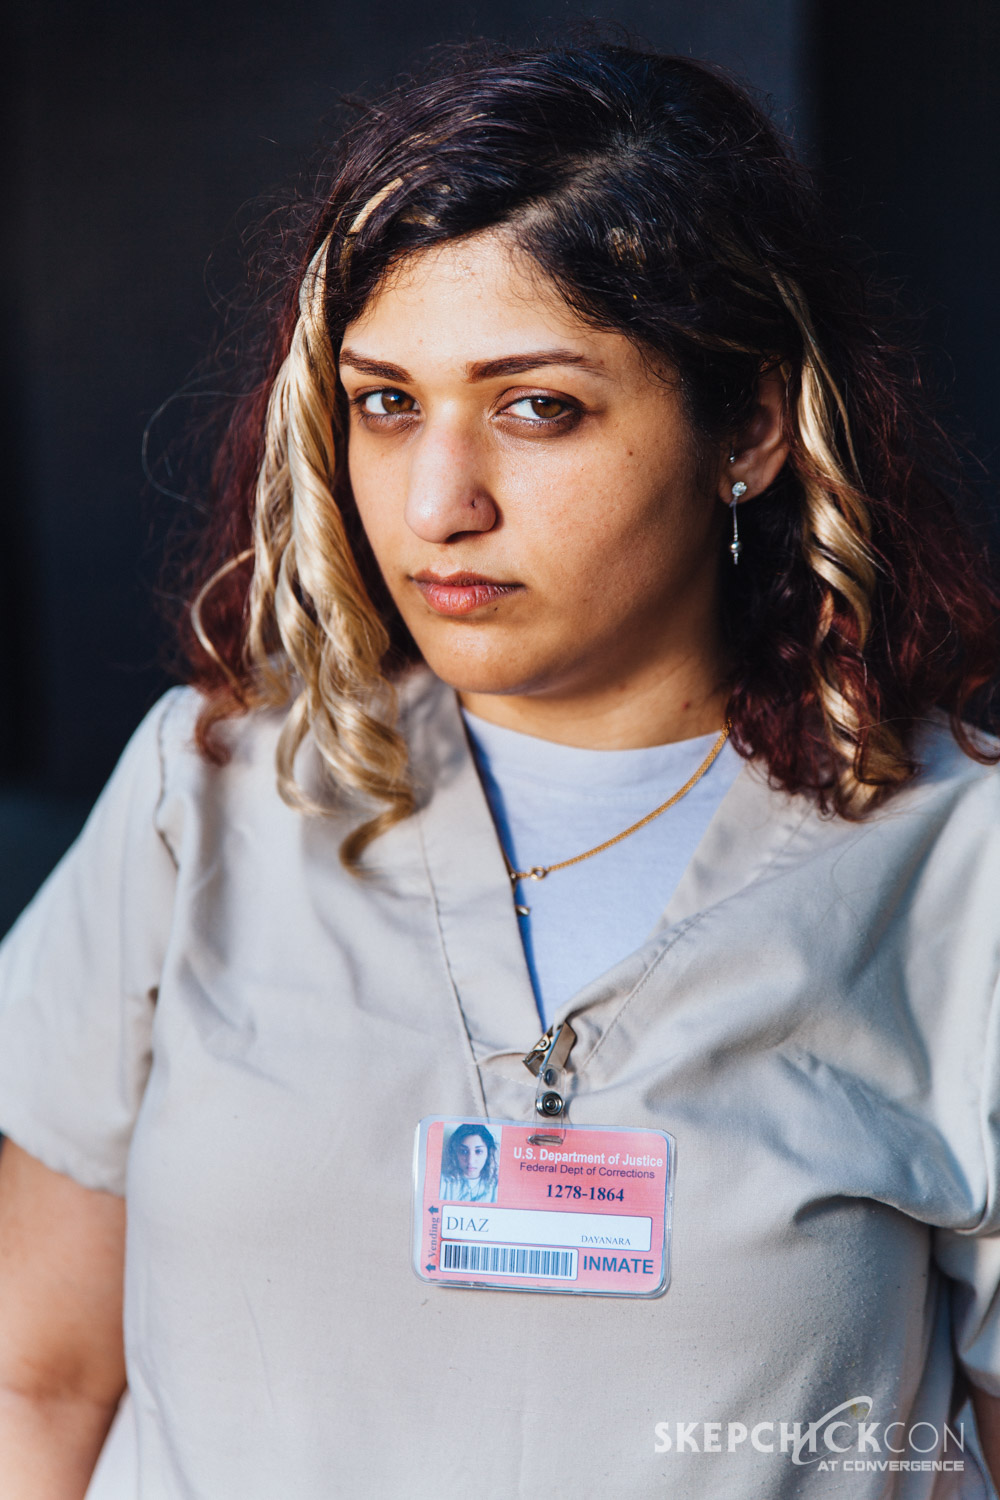
Contouring is also excellent for costuming. I relied on it to give me the look I wanted when I cosplayed Dayanara Diaz, a character who doesn’t wear much makeup in Orange Is the New Black but whose angular, somewhat-haggard face is very distinctive.
Why is contouring suddenly A Thing?
Contouring has always been A Thing among professional makeup artists. You kan kall the new koolness of kontouring “the Kardashian effect” (I’m sorry). Less obnoxiously stated, Kim Kardashian, as well as other high-profile people, has popularized contouring among non-professionals who enjoy makeup.
What products do I need to start contouring?
There are a lot of different ways to create light-and-dark effects on your skin. The only rules for what you use are that the highlight should be a few shades lighter than your skin and the lowlight be a few shades darker than your skin. The highlight can be matte or shimmery, but under no circumstances should your lowlight be shiny.
Even with those guidelines taken into account, you have tons of options. My friend Angie uses two shades of BB cream, a more user-friendly variation on the idea of using two different foundation shades. I use a matte bronzer for the dark and a shimmery highlighter for the light. One of my favorite people on the Internet, Alle at xoVain, uses a specialty sculpting powder for moderate contouring; for a more dramatic look, she used concealer for highlight and eyeshadow for lowlight. There are specialty contouring palettes out there, I’m told
If you’re feeling overwhelmed with the options and unsure as to how much you’ll be contouring in future, your best bet would likely be to go for a product that you can use for other purposes as well rather than anything specialized to contouring. I’d recommend concealer for the highlights and a matte brown eyeshadow for the lowlights. In case you don’t end up liking contouring or do it only rarely, the concealer can be used to cover up blemishes and the matte brown shadow can be used to fill your brows or even on your lids for its intended eye-shadowing purposes.
Some techniques for contouring also involve blush. If you’re a newb to blush, this is a good guide to powder blush and this is a good one for creams.
What sorts of applicators and blending tools will I need for contouring?
Without properly applying and blending your contouring, you’ll look like you streaked glitter and dirt all over your face. Unless that’s the look you’re going for (and if so, more power to you and may I borrow some of that confidence sometime?), you’ll want to apply precisely and blend thoroughly.
What applicators and blending tools you will need depends on what products you get. Products with creamier formulas (foundations, BB creams, concealers, cream highlighters) can be both applied and blended using sponges or your fingers. To avoid muddying your colors, be sure to use a different side of the sponge or a different finger for highlights vs. lowlights.
Products with drier formulations (powders of all kinds, certain stick-style products) can be applied and blended using a wet or dry sponge, but a wet or dry brush will likely be a better choice. I prefer the precision of angled brushes (especially below my cheekbones — I have a brush I bought solely for that purpose) for shadows, and the melting powers of my fingers or a sponge for the highlights. To avoid color-muddying, I wipe off my brushes thoroughly with a handkerchief or paper towel between shades.
If you’re using blush, then the usual blush brush and blending technique will do.
I have my colors and my tools to apply and blend them. Where do I put them on my face?
This quick guide to contouring is a wonderful place to start. To continue, this giant celebrity-based guide is a fun one to make your way through; I prefer its photographic style to the line versions that are so common online. So far, I like diamond best because it makes my face look intimidating and fierce, but I enjoy trying out the different options based on my mood.
Got beauty questions? Drop me a line via the method of your choice: Twitter / Tumblr [anon enabled] / Facebook/ ask.fm (anonymous) / email
[…] or need things I didn’t understand, too. Bronzer was one of those things, and now it’s a contouring staple for me. Maybe primer will be something that will benefit you, and maybe it won’t, but after reading […]
[…] not what matters here. Then I added highlighter to the inner corner and under my browbone. For contour, I did my cheekbones with matte bronzer under, shimmering bronzer on the cheek as blush, and a […]
[…] you see what she did there with the shadows? I do! Given that her popularization of facial contouring has been of the kind that is supposed to make you look more conventionally attractive, I dig how […]